¶ Task Management (Task Engine)
¶ Introduction
The Task tool via the Task Engine is designed to drive action in the plant. A Task is a piece of work with a time-frame for completion and assigned to a specific owner along with multiple collaborators. With the mobile application also a part of the offering, plant users can use the engine as the primary communication framework for varied use cases.
Below are some of the capabilities of the Task engine:
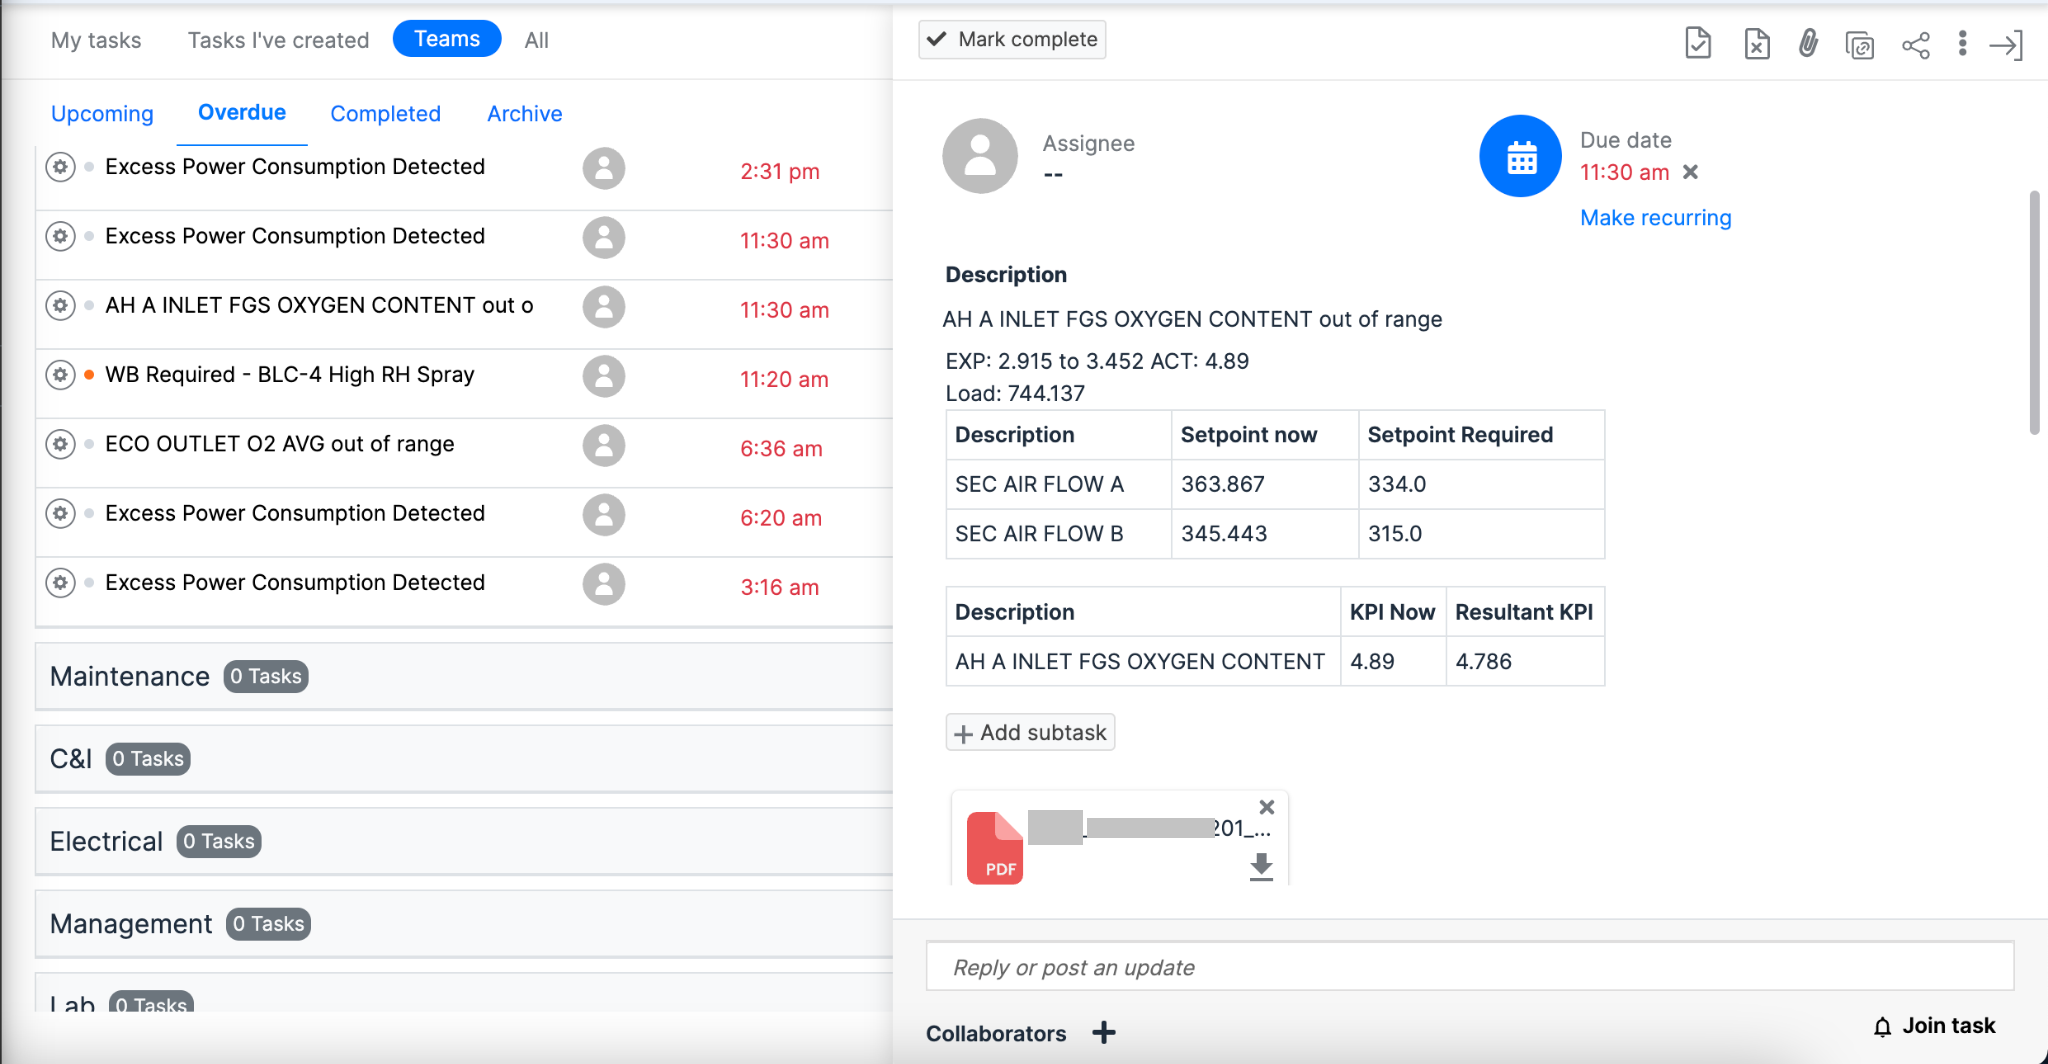
Figure 24. Task page
- Use cases:
- Workflow: Assign action on a predictive model based Incident to a plant user to take specific actions, thereby also serving as a prioritization method
- Recurring Tasks: Team-specific or person-specific tasks can be created to notify and document regular tasks (like creating a end-of-shift report or to update lab report data)
- Optimization Recommendations: Pulse can be used to build custom advanced modules which recommend specific process changes (like setpoints) to the plant users which are communicated on this engine
- Features:
- Individual and team-wise view of tasks based on status (Upcoming, Overdue, Completed)
- Attach documents, images and other artifacts related to the job carried out
- Provision to manually enter the actual benefits from a task in ₹ figures on completion of the task. This helps close the workflow loop from an Incident to a valid catch to documenting the actions taken and the realized benefit.
- Notifications of task creation and other activities will be sent on mail to all the collaborators involved
- Mobile-enabled: Users can create tasks from Incidents or otherwise from Pulse’s standard mobile application.
¶ Why Tasks?
¶ Efficient Task Management:
The Tasks page centralizes all tasks, providing a comprehensive view of individual, team, and organizational responsibilities.
¶ Enhanced Collaboration:
- Enables seamless collaboration by providing a platform for assigning tasks to team members, fostering teamwork and shared responsibilities.
- Enhances transparency as team members can easily access and track each other's tasks, promoting a collaborative work culture.
¶ Deadline Management:
- Equips users with the ability to set deadlines, ensuring timely completion of tasks.
- Sends reminders and notification for task updates, reducing the likelihood of overdue tasks.
¶ Cost-Benefit Tracking:
- Users can enter cost benefits incurred upon closing a task, allowing for the monitoring of financial gains associated with completed tasks.
- Enables the calculation of overall cost benefits at the organizational level, aiding in the assessment of the application's impact on financial outcomes.
The Task Management tool helps you manage task creation and assignment. You can set the status of the task such as, Not started, in progress, Done, Deferred to keep a close watch on the progress. You can view the tasks that are assigned to you as a user or that you created, or the system generated tasks as recommendations. You can view the Upcoming, Overdue, Completed and Archived tasks with details in separate pages. You can view the task details teamwise, that is, which team is assigned which task and what is its progress status.
¶ Task Generation
Tasks are categorized as:
-
System generated
-
User generated
System Generated Tasks can be any of these:
-
Recommendations that the Pulse provides based on certain analysis performed in the background,
-
Activities that notify users of activities carried out by an operator based on recommendations provided by the system.
User Generated Tasks
Users can create Tasks and assign them to relevant users. Users can also assign an incident as a task to other employees.
¶ Other Sources of Task Generation
The tasks that are created via the Incident page, the Rotary Asset Manager page, and the Optimization tool via Training model appear in the Tasks page that can be assigned to an employee.
Depending on plant requirements, you can make a task recurring by setting the frequency for recurrence.
The Task Management tool also helps you to keep a track of the employee performance vis-a-vis the maintenance and repair of the plant equipment and subcomponents.
¶ Creating a New Task
To create a new task:
-
Click + beside the Tasks option.
A dialog box appears providing an option to create a task, and create a subtask, if required.
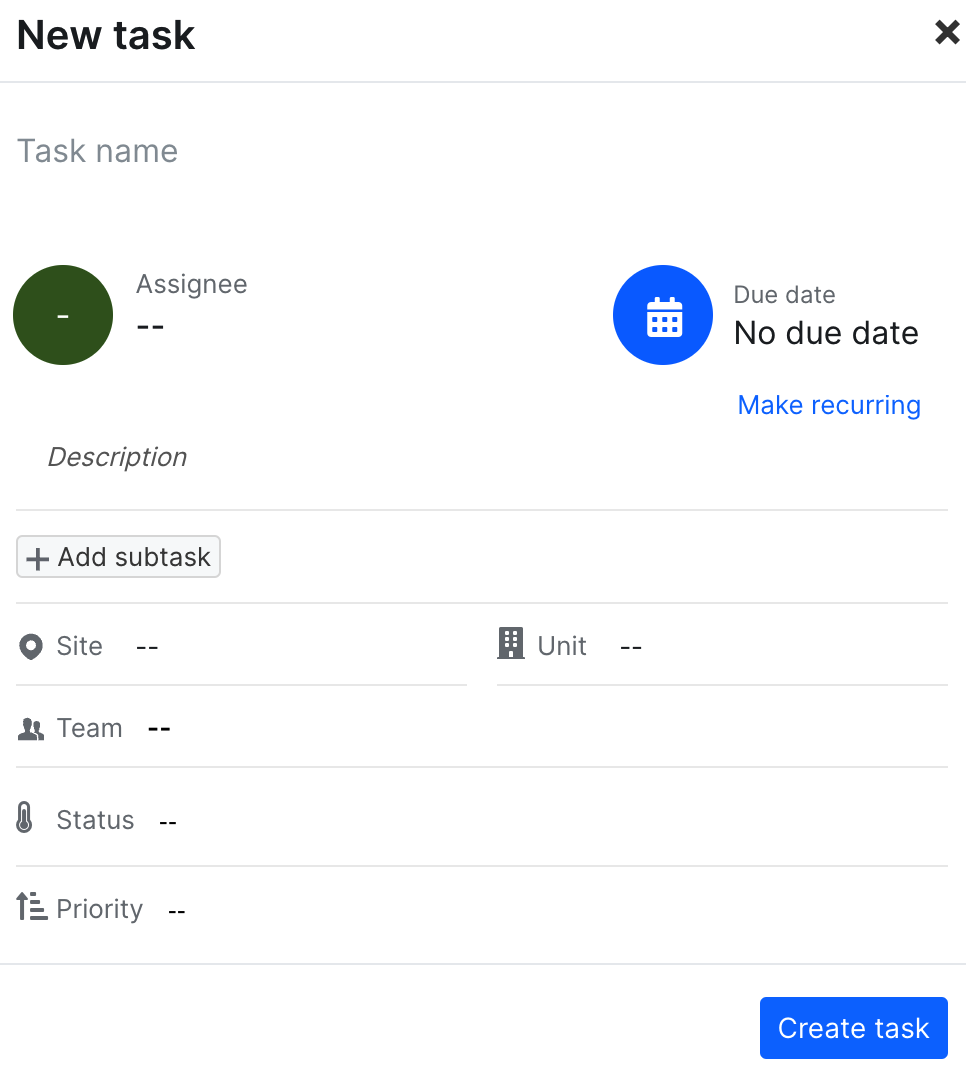
Figure 25. New task creation
-
Enter a name for the task.
-
Select the assignee name from the drop-down list.
-
Select the due date of the task from the calendar. Or, you can make it a recurring task without a due date.
-
Click Add subtask to add a subtask, if any.
-
Select a site from the Site dropdown list.
-
The corresponding unit is automatically selected. If not, select a unit from the Unit drop-down list.
-
Select a Team from the Team drop-down list.
-
Select a Task status from the Status drop-down list.
-
Select a priority from the Priority drop-down list.
-
Click Create task
The Tasks screen shown below appears by default.
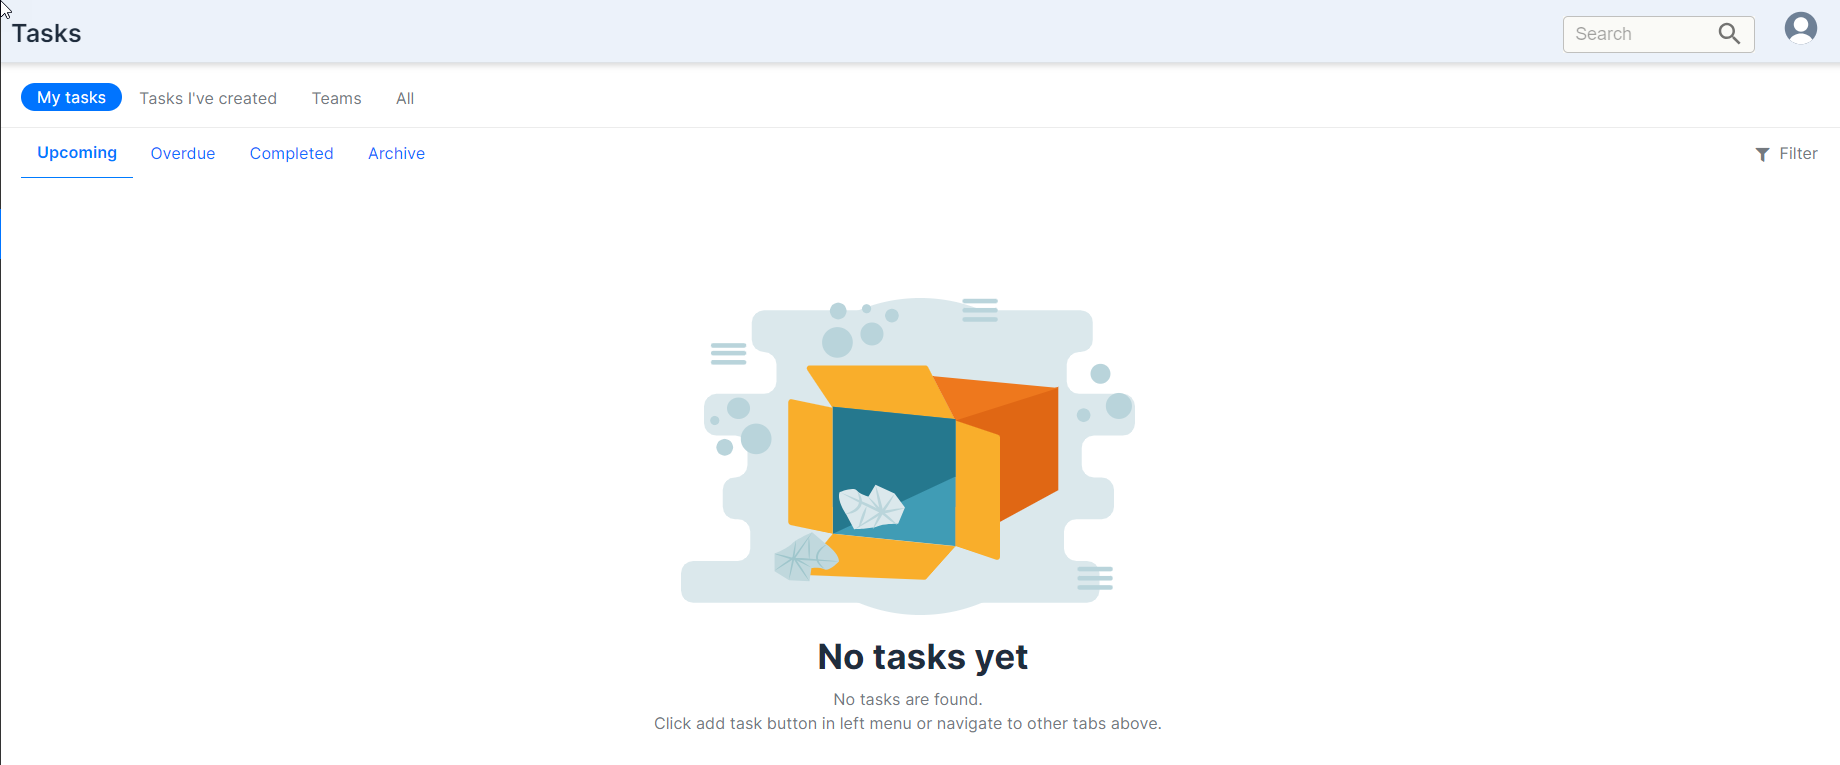
Figure 26. Default tasks screen
¶ Editing Task Details
- Click All to display all the tasks.
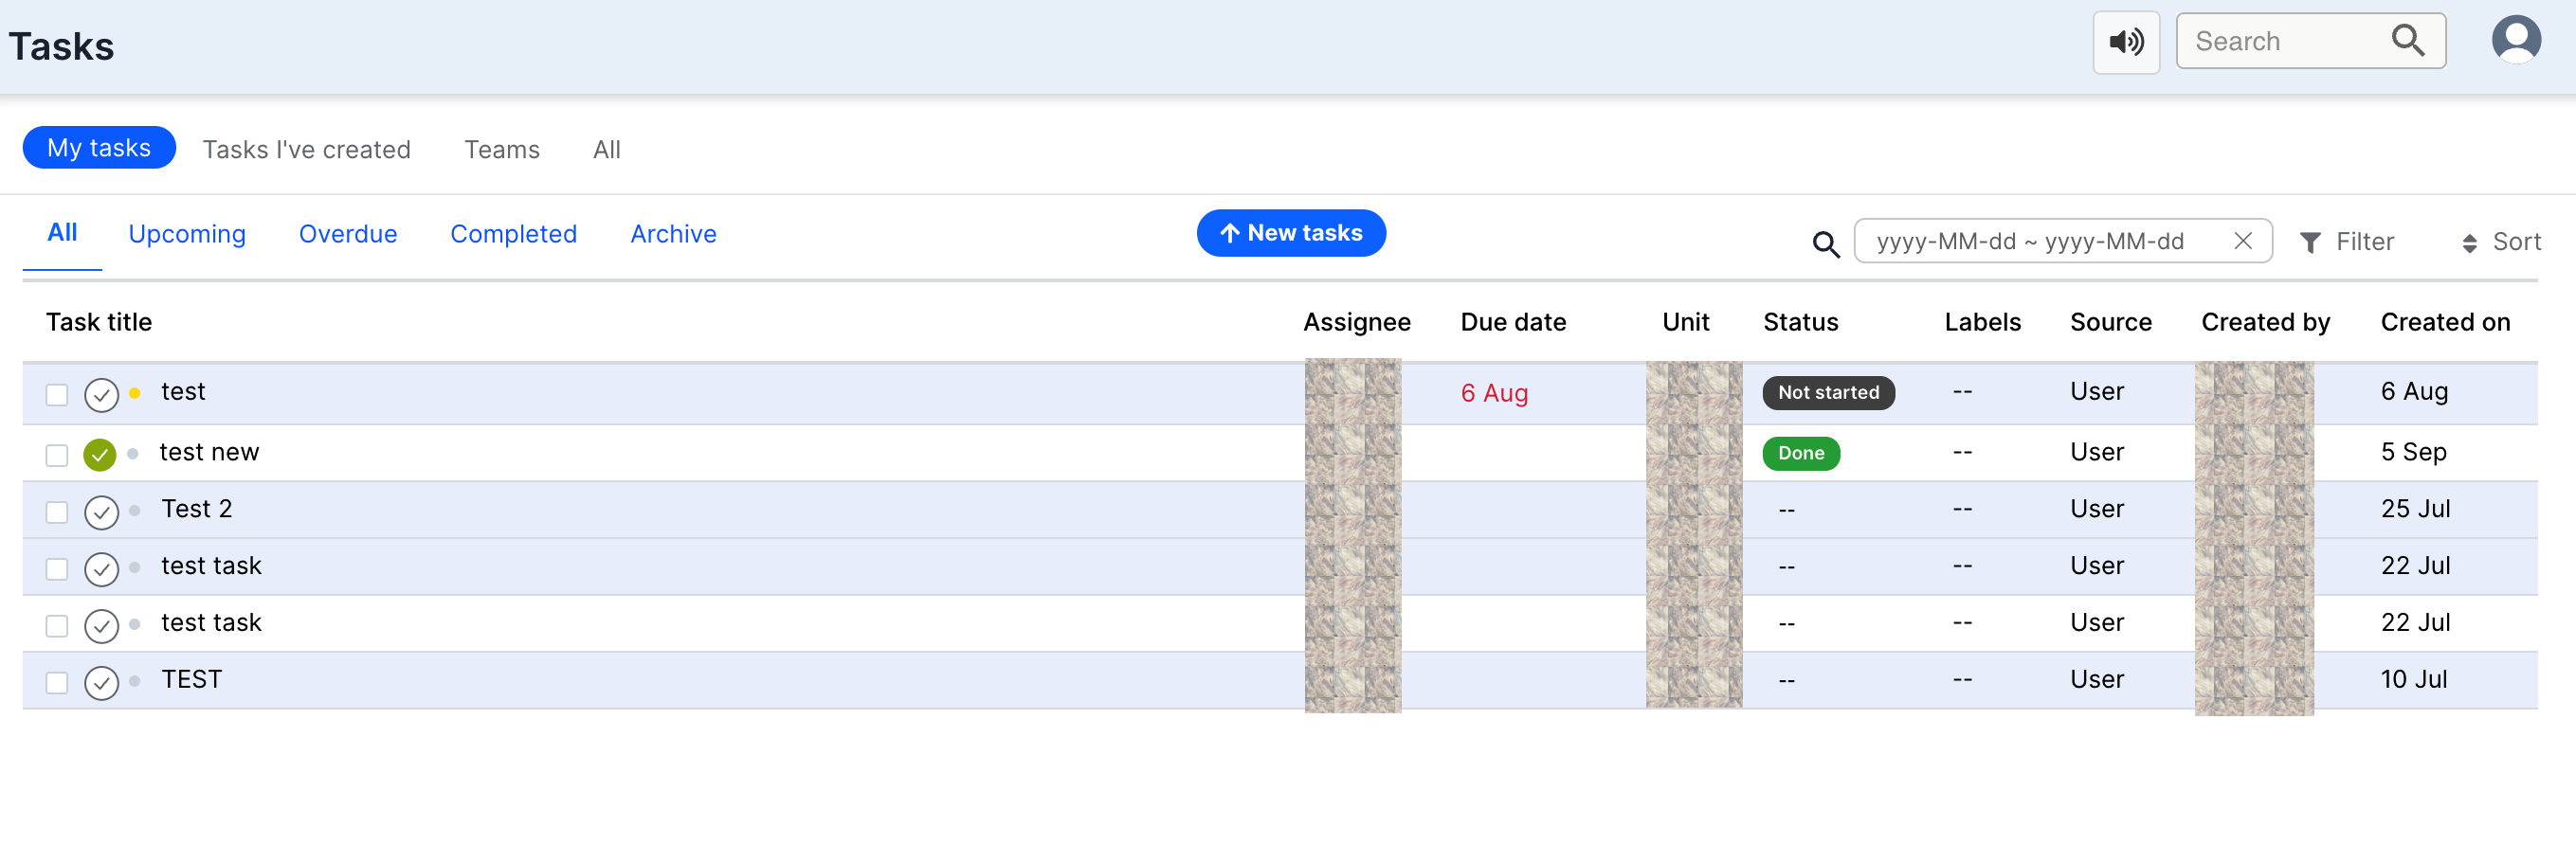
Figure 27. List of tasks
The following columns appear on the Tasks page:
-
Task title - This column shows the task by their titles
Subtasks count and comment count
 - The number of subtasks and comments appear beside a task title, where applicable.
 -
Blue dot ( .) - A blue dot beside a task title indicates that the task has not been viewed.
-
Assignee - This column lists the assignee initials, such as SS for Suresh Susarla.
- Click the assignee initials to change.
-
Due date - This column displays the due date of the task to be completed.
- Click the date to change it.
-
Unit - This column shows the unit name.
- When you click the Unit name, the Task details page appears.
-
Status - This column shows the status of the task.
- Click the status to change it.
-
Source - This column shows the source of the task. For example, Incidents is appearing here. When you click Incidents, the Task details page appears..
-
Created by - This column shows the initials of the user who created the task. When you click the initials, the Task details page appears.
-
Created on - this column shows the data on which the task was created. When you click the date, the Task details page appears.
-
Search box - Use the search box to search for anything related to tasks on this page. Enter a few letters. The relevant tasks are displayed.
-
Filter icon - Use the
 icon to sort the Tasks page columns by a particular element.
When you click Filter, the following filters appear. Click the element from the filters list to sort the Tasks list by that filter.
Then click Apply.
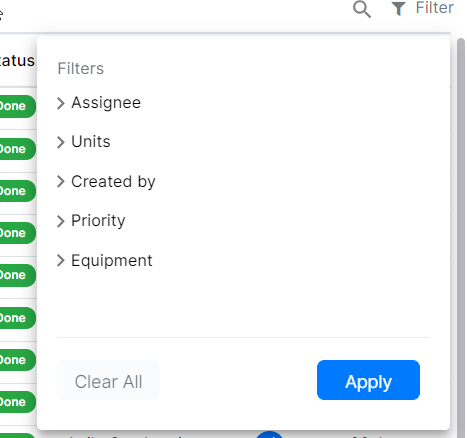
Figure 28. Filter dropdown
- Click beside the task title to view the task.
The task details appear in a separate window to the right.
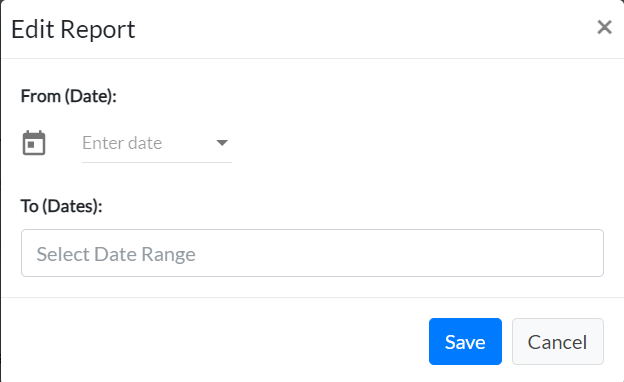
Figure 29. Edit report window
The activities that a user (based on permissions) can perform on the Task details page, beginning from top, are:
-
Mark a task complete
-
Accept or reject a task
-
Attach a file
-
Copy task link
-
Share the task
-
Delete task
-
Merge duplicate tasks
-
Assign task to a team
-
Change status of a task
-
Change priority
-
Edit Labels
-
Assign a task to a different user
-
Make recurring
-
Edit task description
-
Add subtask
-
View task activity
-
Add comment
-
Add collaborators
-
Join as collaborator
-
Close details
¶ Marking a Task Complete
To mark a task complete:
-
Click Mark complete.
The following dialog box appears.
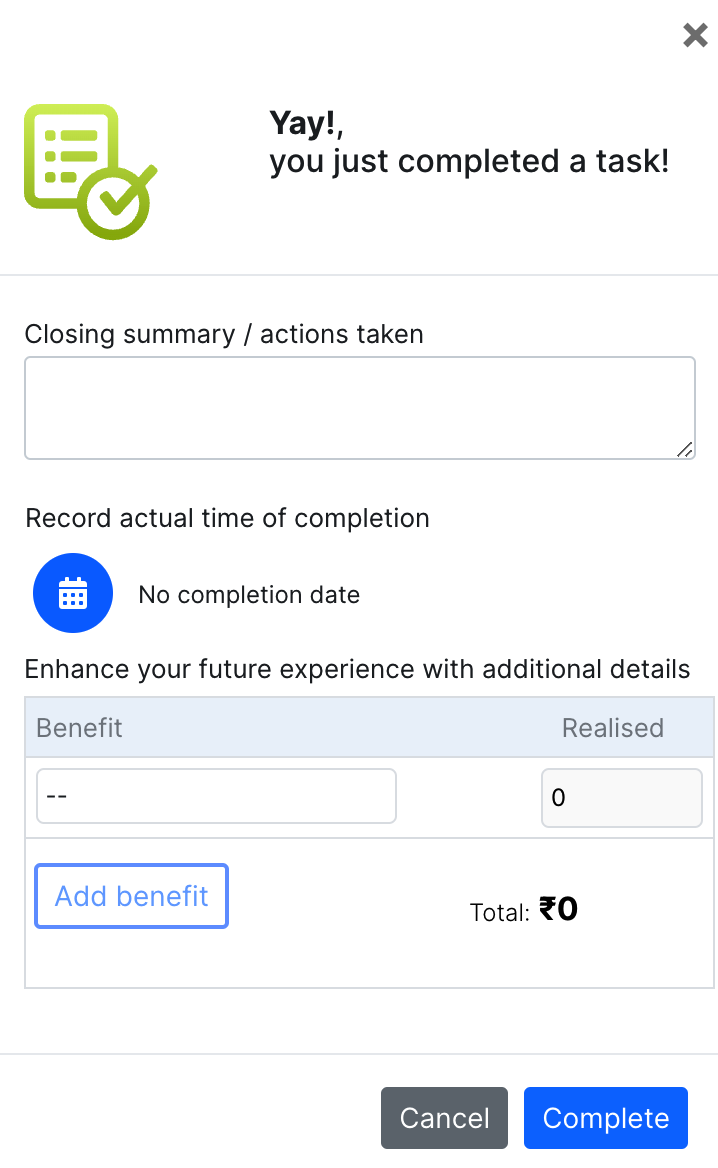
Figure 30. Mark as complete dialog
You can do the following:
-
Enter closing summary and/or action taken.
-
Click the calendar icon, then select a date and time of completion from the calendar.
-
Click whichever is applicable from the following benefits.
-
Avoid Equipment Failure
-
Avoid Shutdown
-
Reduced energy costs
-
Better maintenance
-
The Total field displays the total benefit achieved in rupees.
-
Click Complete in the dialog box to complete the task.
¶ Accepting or Rejecting a Task
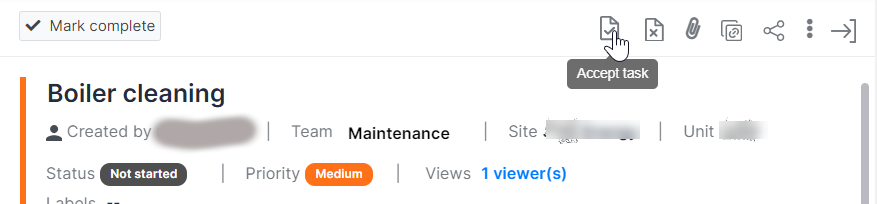
Figure 31. Accept button on task
To accept a task:
-
Click the icon with Tick mark.
Color of the icon changes and the number of tasks accepted appears on the icon.
To reject a task
-
Click the icon with a cross mark.
A dialog box appears to enter rejection reasons.
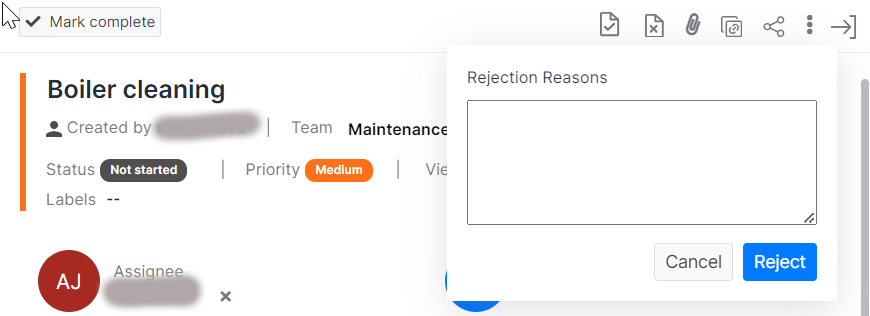
Figure 32. Rejection reason box on task
-
Enter the reasons for rejection of the task.
-
Click Reject.
The color or the icon changes to red and the number of rejections appears on the icon
-
Click the icon again to edit or delete the rejection reason.
The dialog box to edit or delete the rejection reasons appears as shown.
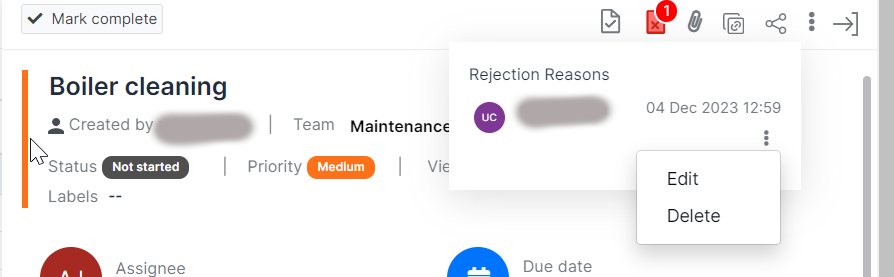
Figure 33. Edit and delete dialog in reject reason dialog
-
Click Delete by clicking the vertical ellipsis icon (three vertical dots) to delete the rejection reason.
-
Click Edit, to change the rejection reason
-
Click Update to update the rejection reason.
The activity history on the Task details page shows the acceptance and rejection.
¶ Attaching a file
To attach a file:
-
Click the Paper clip icon to the right of the Reject icon.
-
Select a file from your desktop.
-
Click Open.
The attached file appears in the Task details page.
You can delete it by clicking the cross.
You can download the file by clicking the Download icon.
¶ Copying a task link
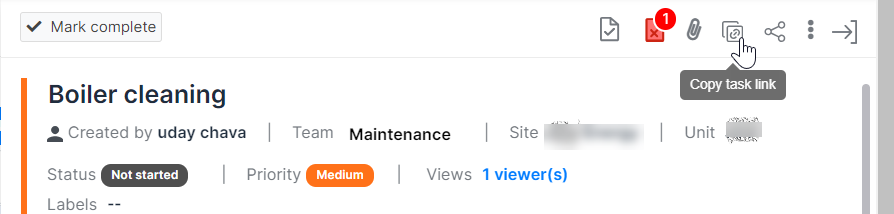
Figure 34. Copy task link button
To copy the task link:
-
Click the link icon on top of the page.
A message appears at the bottom of the screen: “Task link copied to your clipboard”
¶ Sharing the Task
To share a task:
-
Click the Share icon.
Share Task dialog box appears.
-
Enter the email address of the user with whom you want to share the task.
-
Click Send.
An email with the task details is sent to the user.
¶ Deleting a Task
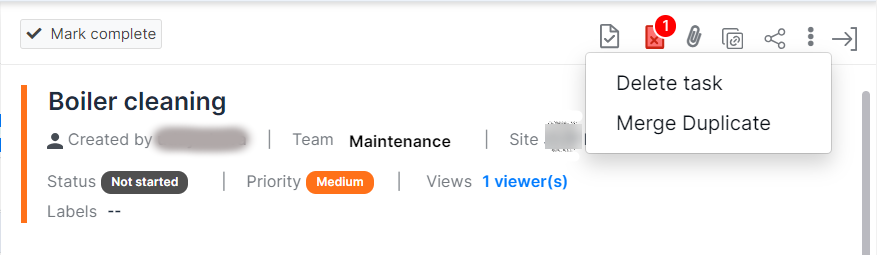
Figure 35. Delete and merge duplicate options on task
To delete a task:
-
Click Delete by clicking the vertical ellipsis icon on the right top of the page.
The task is deleted and the activity list updated with this action.
¶ Merging Duplicate Tasks
To merge the duplicate tasks
-
Click Merge Duplicate by clicking the three dots on top.
A list of tasks appears.
-
Select the task to merge.
Task is merged and marked Complete in the Task details page.
-
In the Tasks screen showing the Duplicate task, click the vertical ellipsis, the screen shown appears.
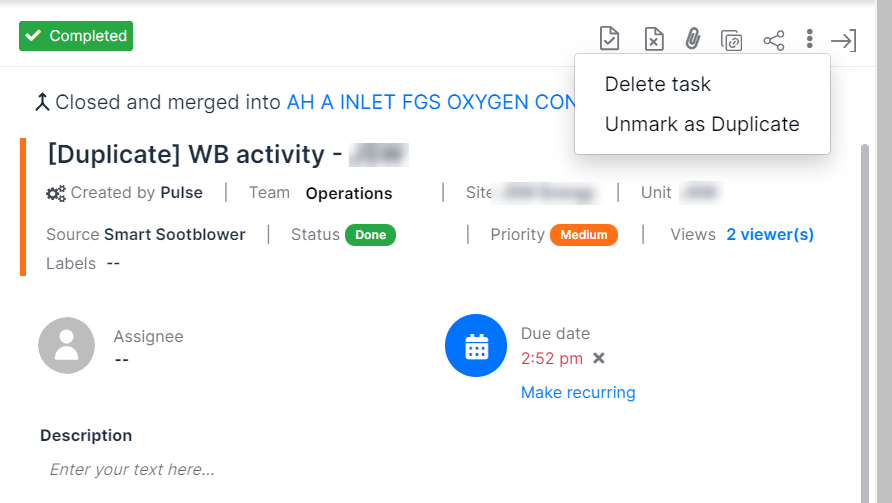
Figure 36. Delete and unmark as duplicate option on task
Click Unmark as Duplicate to unmark the task as duplicate.
The Tasks details screen appears with the words [Duplicate] removed.
¶ Assigning Task to a Team
To assign a task to team:
-
Click the down arrow beside the word Team.
-
Select a team from the drop down menu
The task is assigned to that team.
¶ Changing Task Status
To change task status:
-
Click the ellipse showing the status
The available status appear: Not Started, In Progress, Done, Deferred
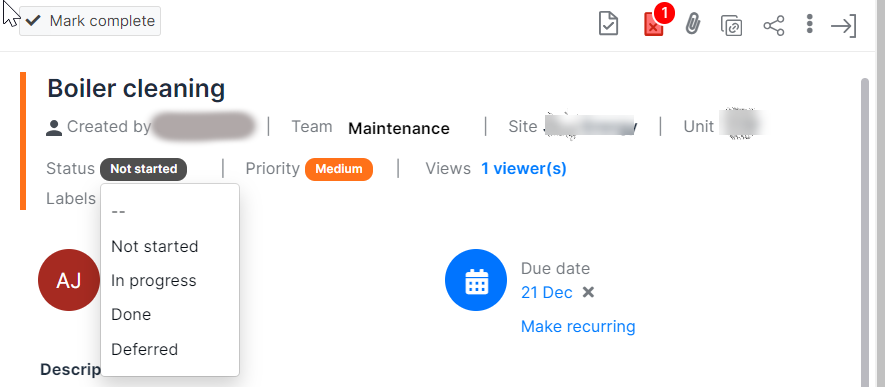
Figure 37. Status dropdown on the task
- Select the status that you want from the list
¶ Changing Priority
To change the task priority:
-
Click the ellipse showing the priority.
The drop-down list with available priorities appears.
They are: High, Medium and Low.
-
Select the priority you want to assign.
¶ Editing Labels
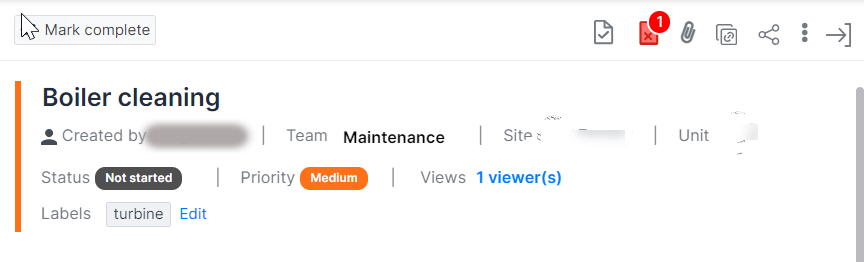
Figure 38. Edit labels button
To add/edit labels:
-
Click beside the word Labels.
A text box appears.
-
Enter the new label.
-
Click Submit.
-
Click Edit.
The available labels appear.
-
Click the x mark on the label to remove it.
-
Click a label from the list to add it or enter words to add label.
-
Click Submit.
¶ Assigning task to a different user
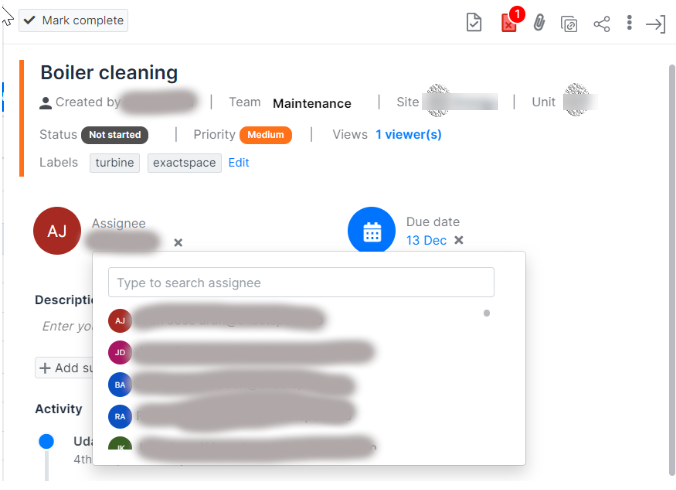
Figure 39. Dropdown showing list of users
To assign a task to a different user:
-
Click the assignee name.
List of users appears.
-
Select a user to assign the task.
¶ Making a Task Recurring
To make task recurring:
-
Click the Make recurring link.
Recurrence Pattern drop-down box appears.
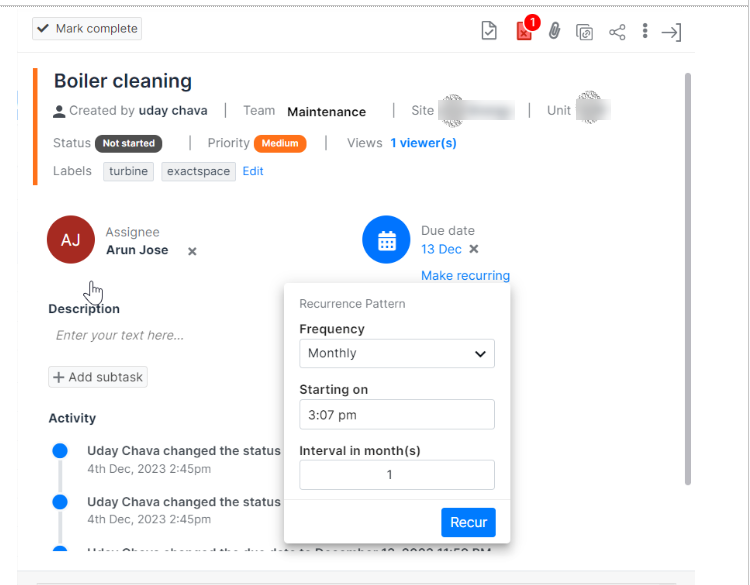
Figure 40. Recurrence pattern dropdown
Note: Use this option when you want a certain activity to be repeated at regular intervals for the proper upkeep of the equipment or component. For example, cleaning of the soot from a chimney that accumulates rapidly because of the constant use of the equipment, or checking of boiler pressure at frequent intervals.
- Select these details:
-
Frequency
-
Yearly
-
Monthly
-
Weekly
-
Daily
-
Hourly
-
Starting on - Shows the time set in the system
-
Interval in - Select the the interval of recurrence based on the frequency selected
- Then click Recur to complete the action.
¶ Editing Task Description
To add or edit the task description:
-
Enter the details in the Description field.
-
Use the formatting options to format your text.
¶ Adding a subtask
To add a subtask, do the following:
-
Click Add subtask.
The following fields appear.

Figure 41. Subtask
- Enter a name for the subtask.
- Click the calendar icon to set a date and time for completion of that task.
- Click the icon next to the calendar icon to search an assignee and assign the subtask.
- Click the Delete icon to delete the subtask.
¶ Viewing Task Activity
In the Activity field, the history of activity about the task appears in chronological order with the latest activity on top.
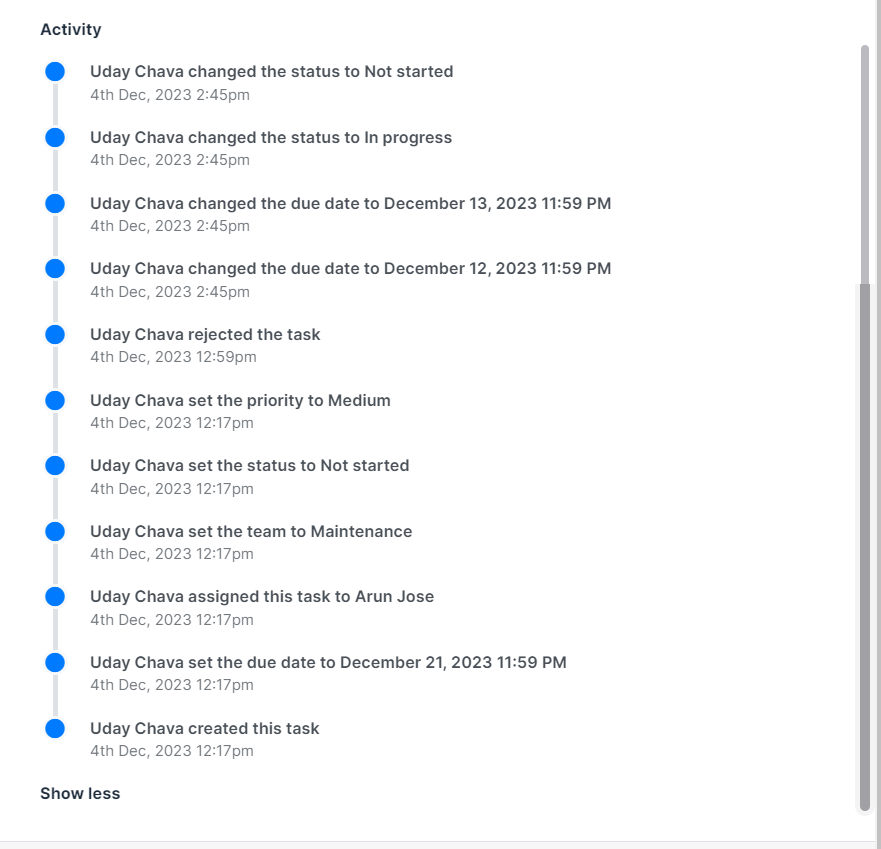
Figure 42. Activity tab
- Click Show more to view the complete list of activities related to this task.
¶ Adding Comment
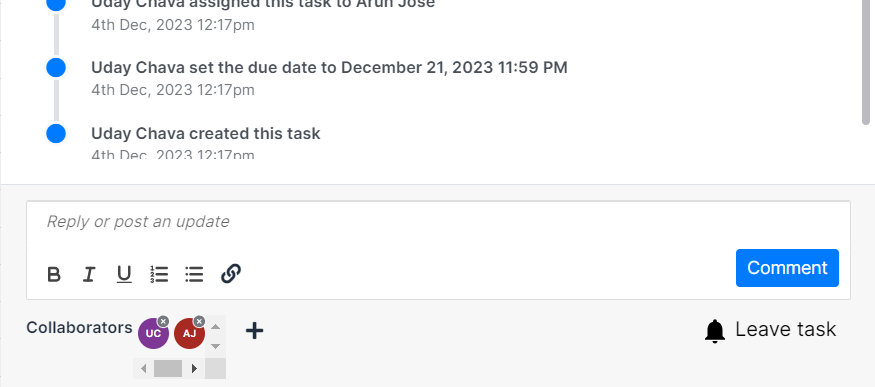
Figure 43. Comment box
To add a comment or post an update:
-
Enter the text in the box.
-
Click Comment.
The comment is listed on top in the Activity area.
¶ Adding Collaborators
To add a collaborator to the task:
-
Click the + icon.
List of users appears.
-
Click a user from the list to add as a collaborator
The initials of the user appear as one of the collaborators.
¶ Joining task as collaborator
To join the task as collaborator:
- Click the bell icon with the words Join task
The logged in user’s initials appear in the list of collaborators.
- Click the bell icon with the words Leave task to exit the task as a collaborator.
¶ Closing Task Details Page
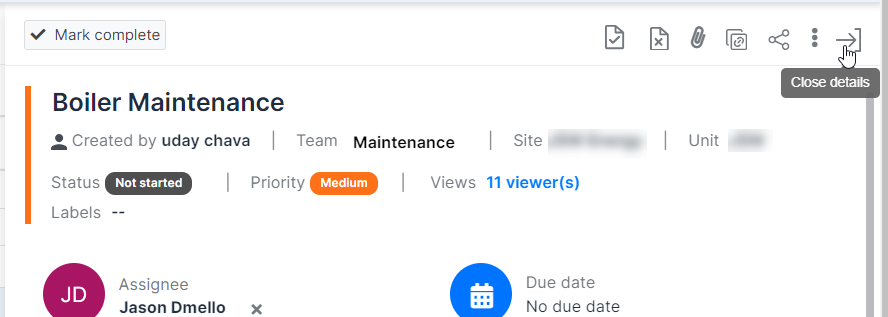
Figure 44. Close details button
To close the task details:
- Click the right arrow icon on top.
The Task details page closes.