¶ Introduction
¶ Purpose of the Rule Engine
The Rule Engine in Pulse is designed to automate monitoring and
notification workflows across different operational modules. It
enables users to define specific conditions under which system events
(such as incidents, reports, or predictive maintenance alerts) are
evaluated and appropriate actions are triggered.In simple terms, the Rule Engine helps users:
-
Identify relevant events based on defined criteria
-
Reduce manual tracking of incidents and reports
-
Ensure timely notifications to the right stakeholders
-
Standardize communication for recurring operational scenarios
It works as a filtering and notification mechanism that continuously
monitors data from selected modules and triggers actions when defined
conditions are met.In practical use, the Rule Engine allows users to control what kind
of events they want to track, when those events should be
considered important, and who should be notified. This reduces
the need for manual monitoring and ensures that critical information
reaches the right people at the right time.
¶ When to Use the Rule Engine
The Rule Engine is typically used in scenarios such as:
-
Sending alerts for critical incidents only
-
Filtering events based on keywords (e.g., boiler, turbine)
-
Notifying specific teams for unit-based events
-
Automating report distribution based on defined rules
¶ Core Working Principle
Each rule follows a structured logic:
IF (defined conditions are satisfied) → THEN (trigger
notification/action)When certain conditions are met, a defined action is automatically
triggered.This ensures that only relevant and filtered information is
communicated.
¶ Accessing the Rule Engine
To navigate to the Rule Engine:
-
Log in to the Pulse Application
-
Locate the left-hand navigation panel
-
Click on Advanced
-
Select Rule Engine
Upon clicking, the system redirects to the Rule Engine landing page.
This page serves as the central place where users can view existing
rules and create new ones.
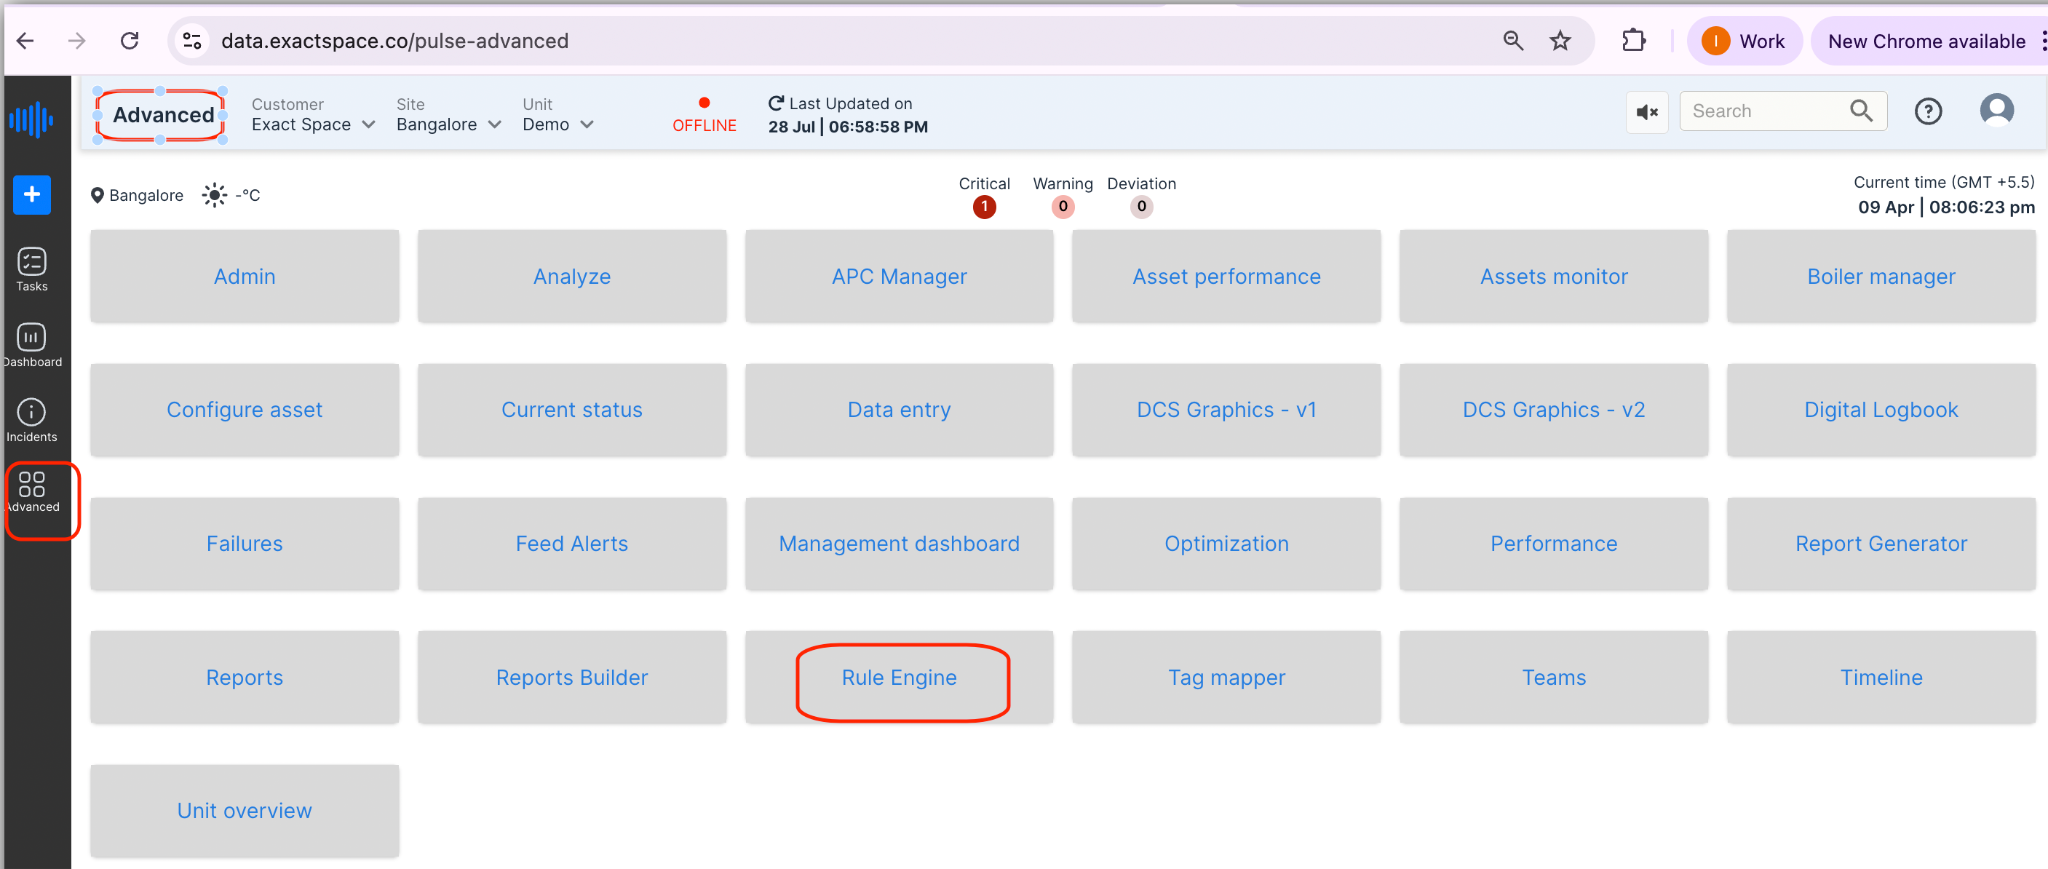
Figure 1. Navigation to Rule Engine from Advanced Menu
¶ Rule Engine Landing Page Overview
When the Rule Engine page is opened, the user first lands on the rules
listing screen. This screen provides a complete view of all rules
created for the selected context.
At the top of the page, a context selection bar is available. This
includes three fields: Customer, Site, and Unit. These fields define
where the rule applies.

Figure 2. Top Panel of Rule Engine
The selection follows a fixed order. The user must first select the
Customer, which represents the client or organization. Once the
customer is selected, the system shows all the sites under that
customer. After selecting a site, the user can then see and select the
units under that site.
This ensures that the rules are always created and viewed within the
correct context. Any change in customer, site, or unit will refresh the
rule list accordingly.
Below the context selection, the main section displays a table of all
existing rules. Each rule is shown with its key details such as rule
name, source, scope, conditions, target users or teams, notification
channel, and status. This gives the user a quick overview of how each
rule is configured.
On the top right corner, the user will find the "Add New Rule"
button. This is used to create a new rule.

Figure 3. Add new Rule
If no rules have been added before and this is the first rule, user will
be redirected to a blank screen which shows that "You haven't Added Any
rules yet". Click on "Add new rule" to add a new rule.
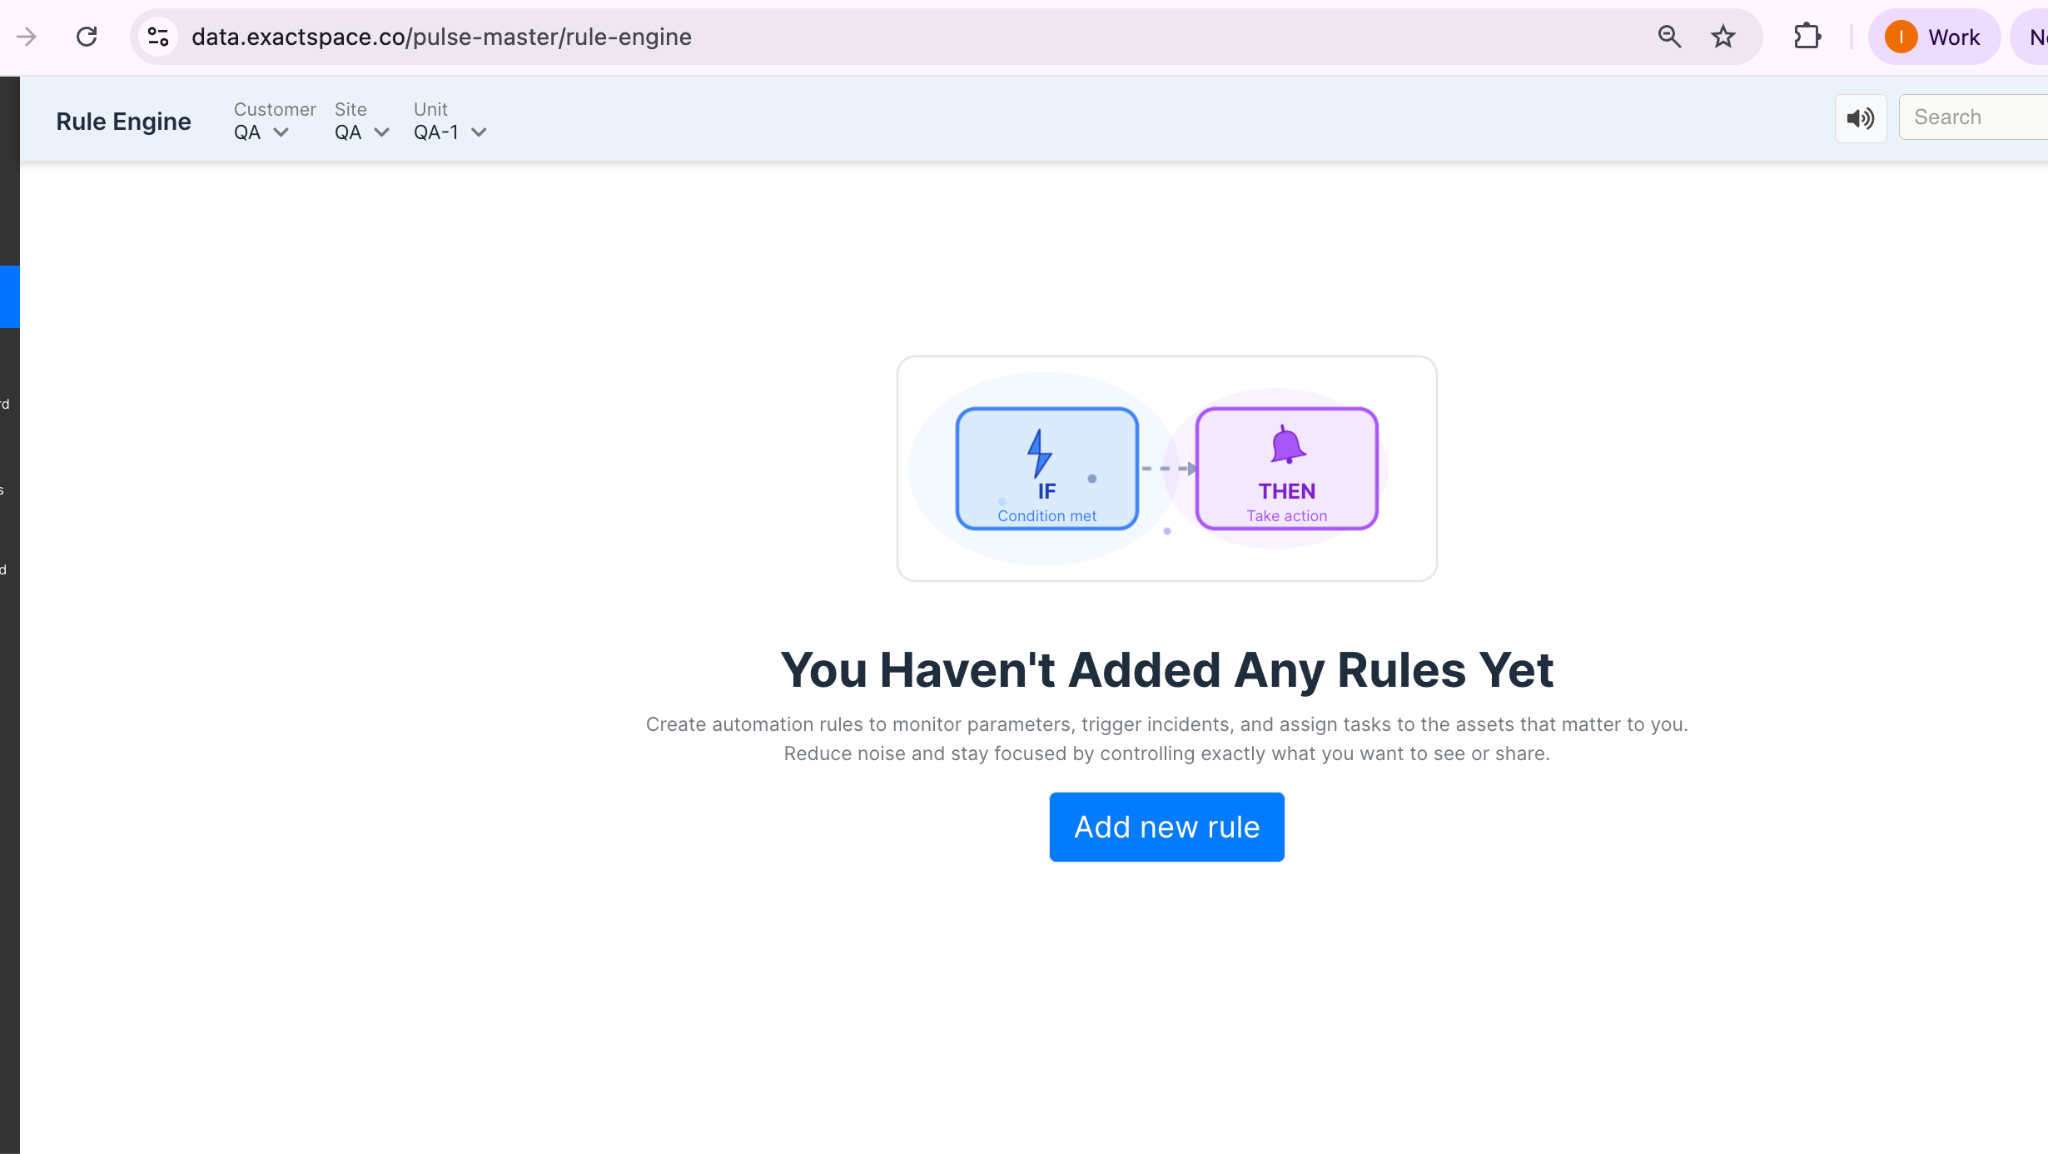
Figure 4. Rule Engine Landing Page Overview
¶ Rules Listing Table
The main screen displays a list of all configured rules.
Each row represents one rule and contains:
Table 1. Listing table
| Column | Description |
|---|---|
| Rule Name | User-defined name of the rule |
| Source | Module used (Incident / Reports / PM) |
| Scope | Units covered by the rule |
| Conditions | Summary of applied filters |
| Target User/Team | Who will receive notifications |
| Notification Channel | Email or SMS |
| Enable | Toggle to activate/deactivate rule |
| Actions | Edit/Delete options |

Figure 5.Rules Listing Table with Key Columns
¶ Rule Configuration Page- Creating a new rule
When the user clicks on "Add New Rule", the system opens the rule
configuration screen. This screen is divided into three main sections,
each representing a step in defining the rule.
These sections are arranged in a logical sequence and should be filled
from top to bottom.
¶ 4.1 Section 0- Where should this happen
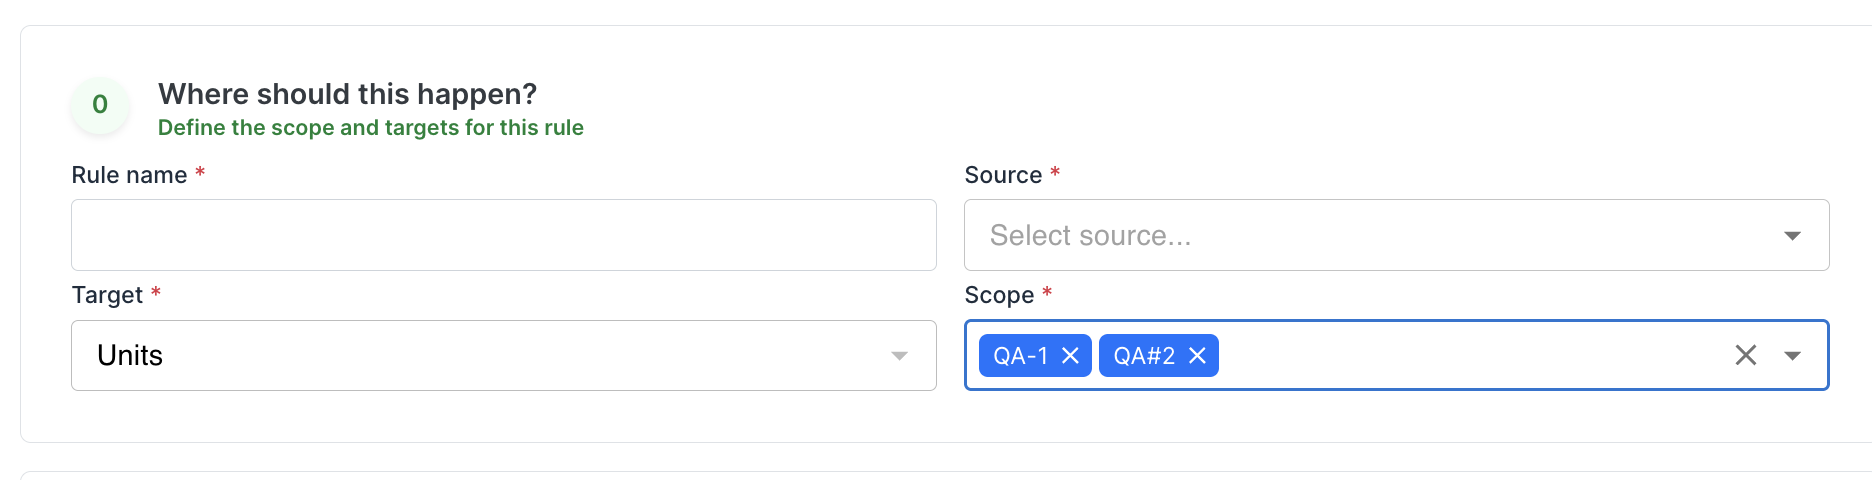
This section defines the basic details of the rule and the area where
it should be applied.The first field in this section is the Rule Name. This is a simple
text field where the user can give a meaningful name to the rule. The
name should clearly indicate the purpose of the rule so that it can be
easily identified later.
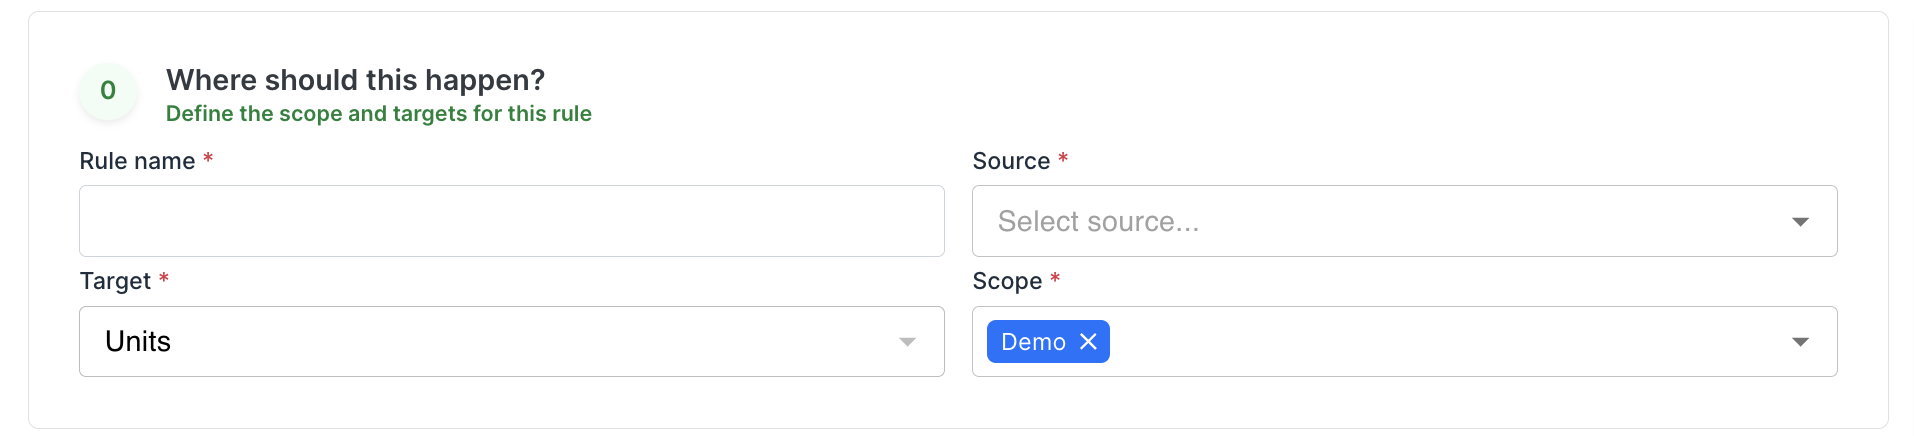
Figure 6. Rule Configuration Page --
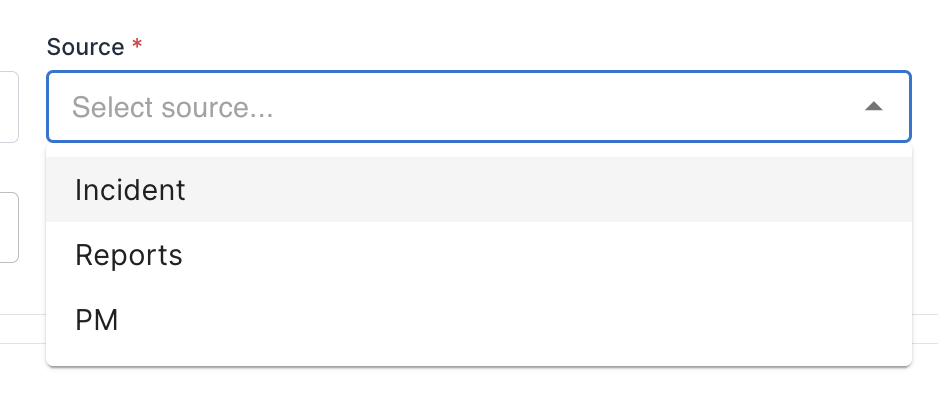
The next field is Source. This defines where the data for the rule
will come from. The user can select from three options: Incident,
Reports, or Predictive Maintenance (PM). The selected source
determines what kind of data will be evaluated when the rule runs.
Figure 7. Rule Configuration Page -- selecting source
After selecting the source, the user needs to define the Target
and Scope. The target refers to the level at which the rule will
apply, which is currently based on units.The Scope allows the user to select one or more units. This means
the rule will only be applied to the selected units. If multiple units
are selected, the rule will run separately for each unit.
Figure 8. Rule Configuration Page
-- Section 1 (When should this
happen)*
This section ensures that the rule is applied only in the intended
area and does not affect unrelated data.
¶ 4.2 Section 1-- When should this happen
This section defines the conditions that must be met for the rule to
trigger.
At the top of this section, the user can choose how the conditions
should work together. There are two options available:
-
All conditions must be true
-
Any condition can be true
If "All conditions must be true" is selected, the rule will only
trigger when every condition is satisfied. If "Any condition can be
true" is selected, the rule will trigger even if one condition is
satisfied.The user can then click on "Add Conditions" to start defining the
conditions.
Figure 9. Rule Configuration Page -- Section 1
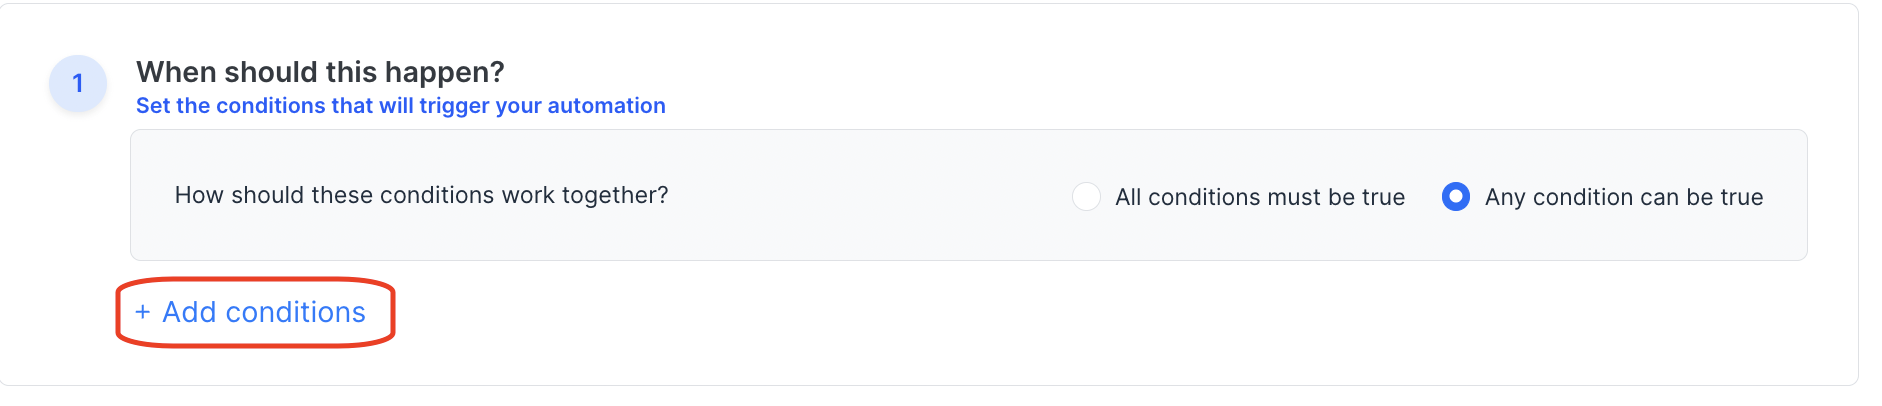
(When should this happen)*
Each condition consists of three parts: a field, a comparison type,
and a value.For example, the user can select:
-
Priority as the field
-
"is" as the condition
-
"Critical" as the value
This means the rule will check for incidents where the priority is
critical.
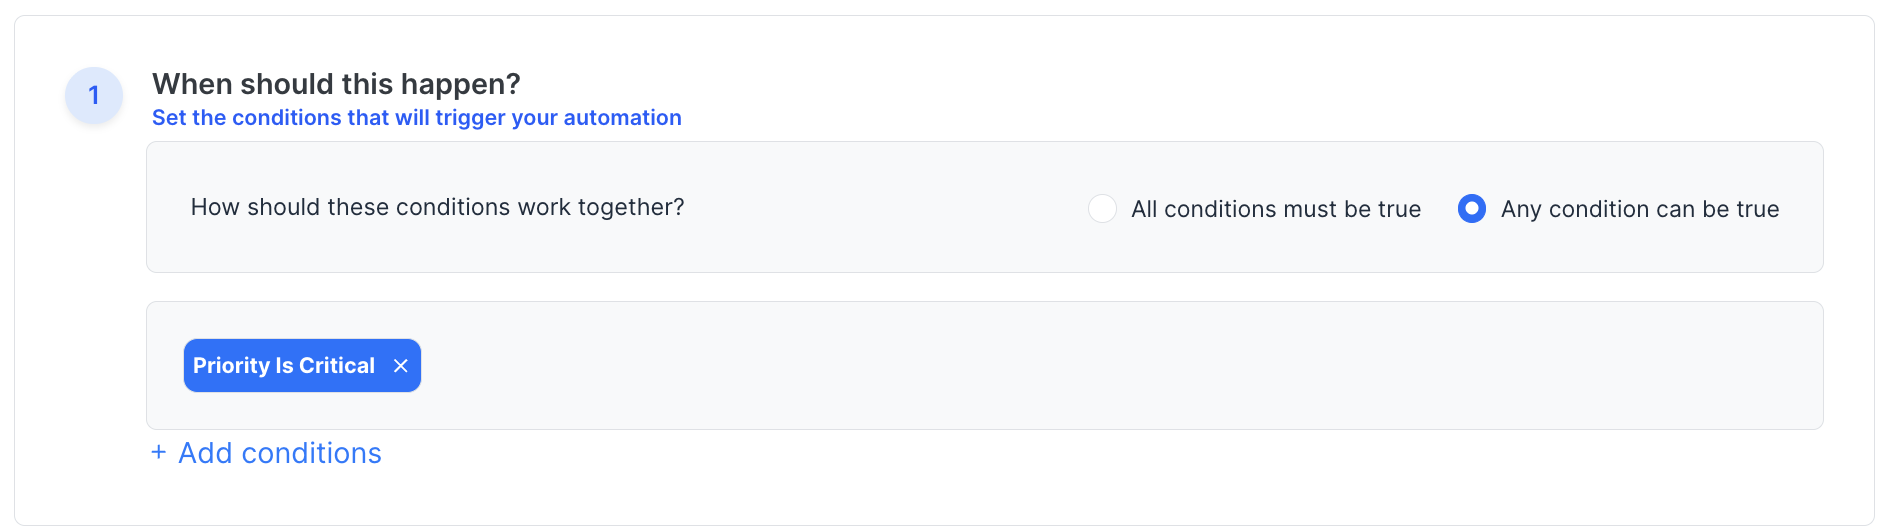
Figure 10. Set the conditions
Similarly, another condition can be added using Incident Name, where
the user can define a keyword such as "boiler". In this case, the rule
will check if the incident name contains the word "boiler".
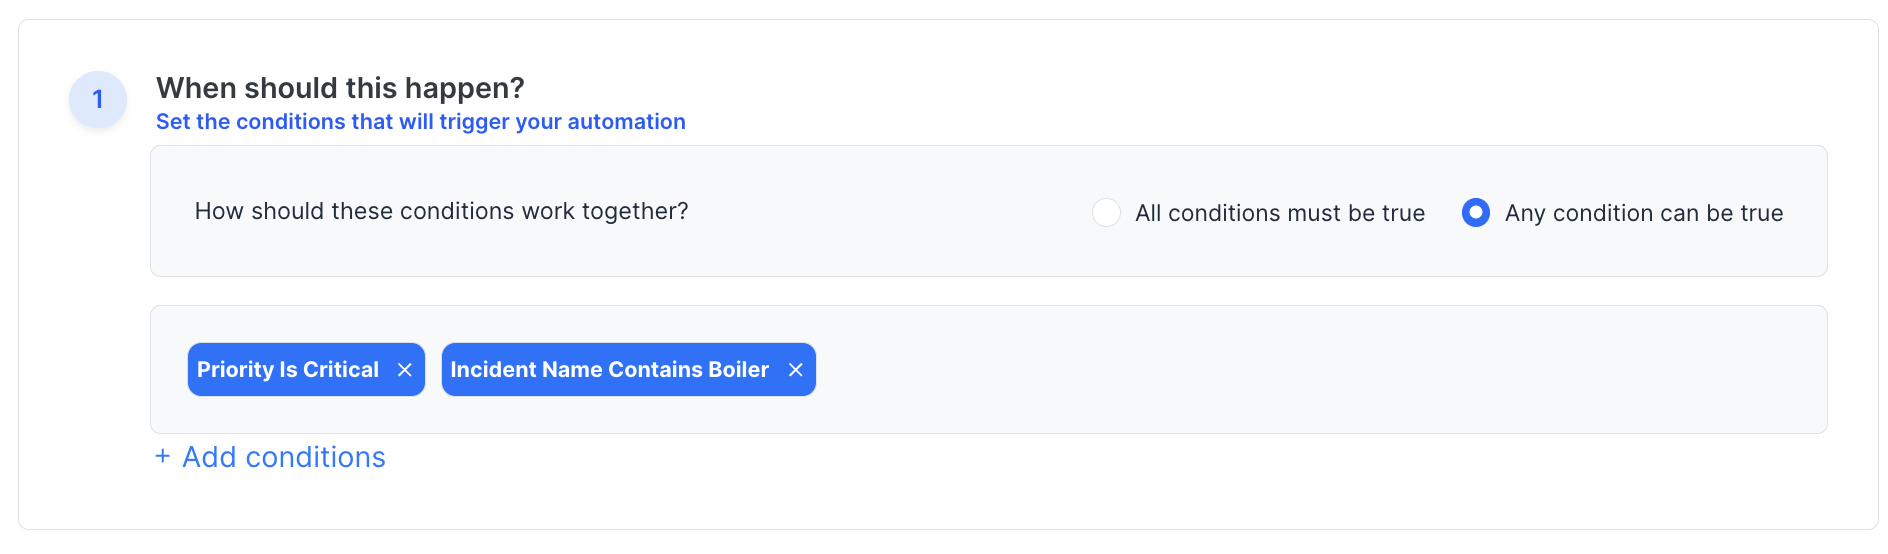
Figure 11. Adding conditions for rules
Multiple conditions can be added as needed. The way these conditions
are evaluated depends on the selection made at the top (all or any).This section is important because it defines exactly when the rule
should be triggered.
¶ 4.3 Section 2 -- What should happen next
Once the conditions are defined, the next step is to decide what
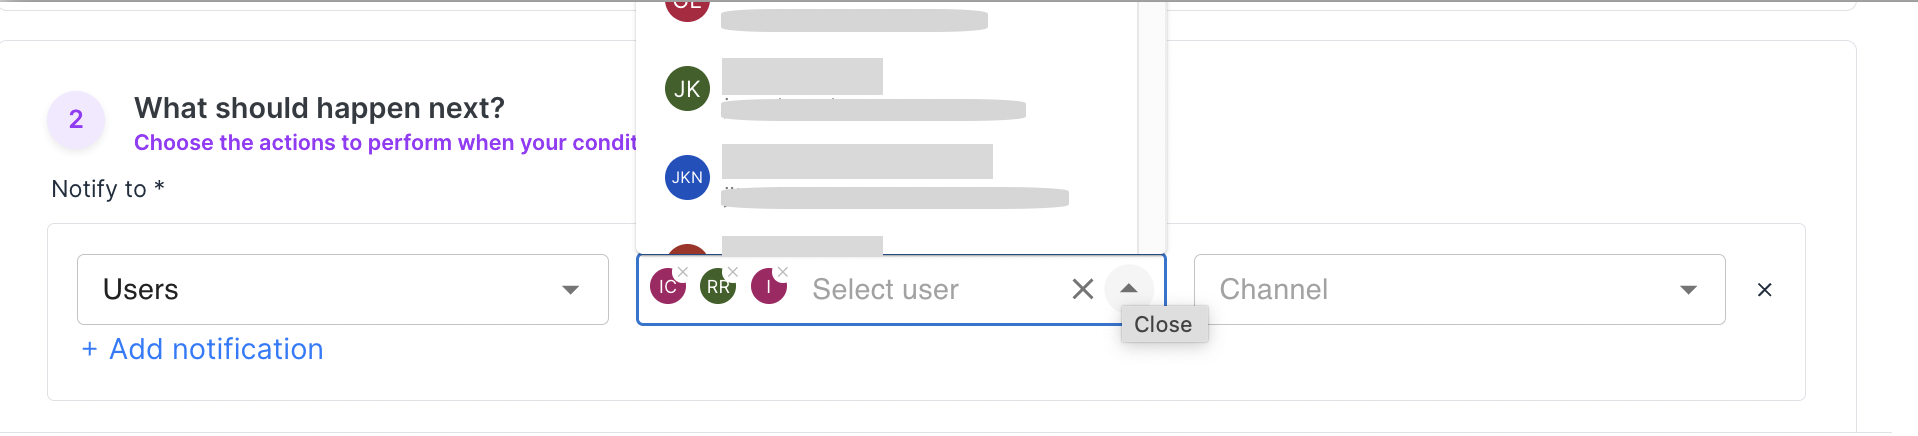
action should be taken when those conditions are met.In this section, the user needs to configure notifications.
By clicking on "Add Notification", the user can define who should
receive the notification and how it should be sent.
Figure 12. Choose the action-what should happen if condition is true
The first option is Target Type, where the user can choose between
Users and Teams. If Users is selected, specific individuals can be
chosen. If Teams is selected, the notification will be sent to all
members of that team.The next step is to select the actual users or teams from the list
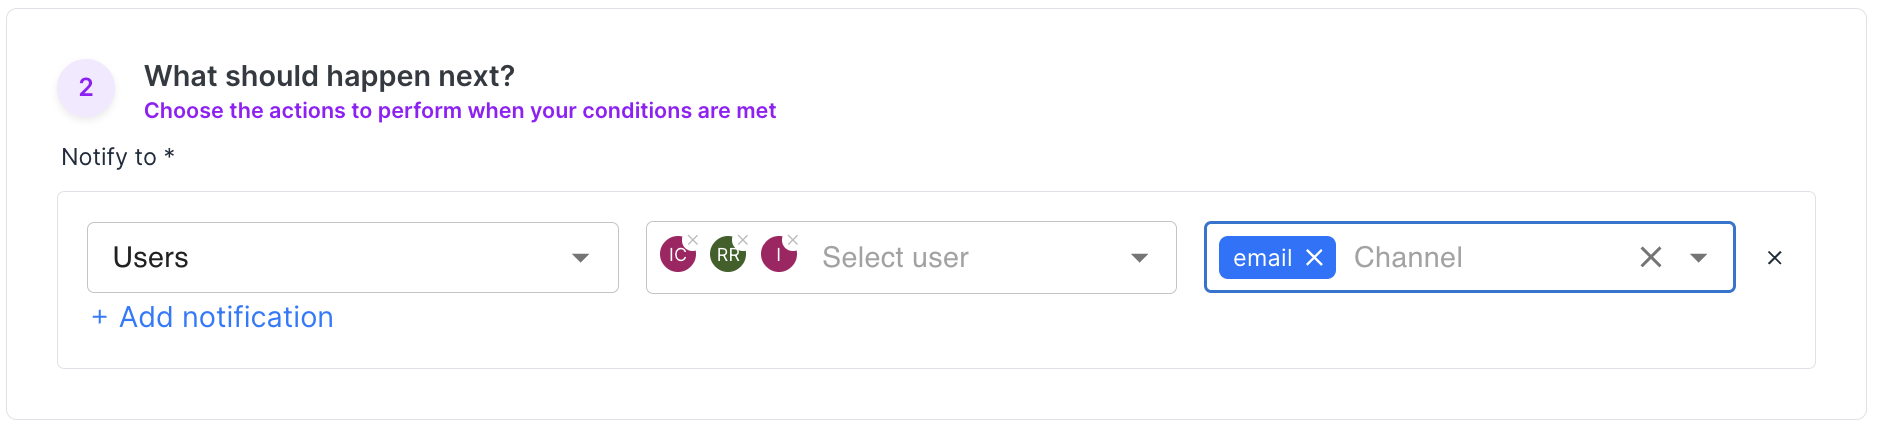
provided.After selecting the recipients, the user needs to choose the
Channel, which defines how the notification will be delivered. The
available options include Email and SMS, depending on the system
configuration.
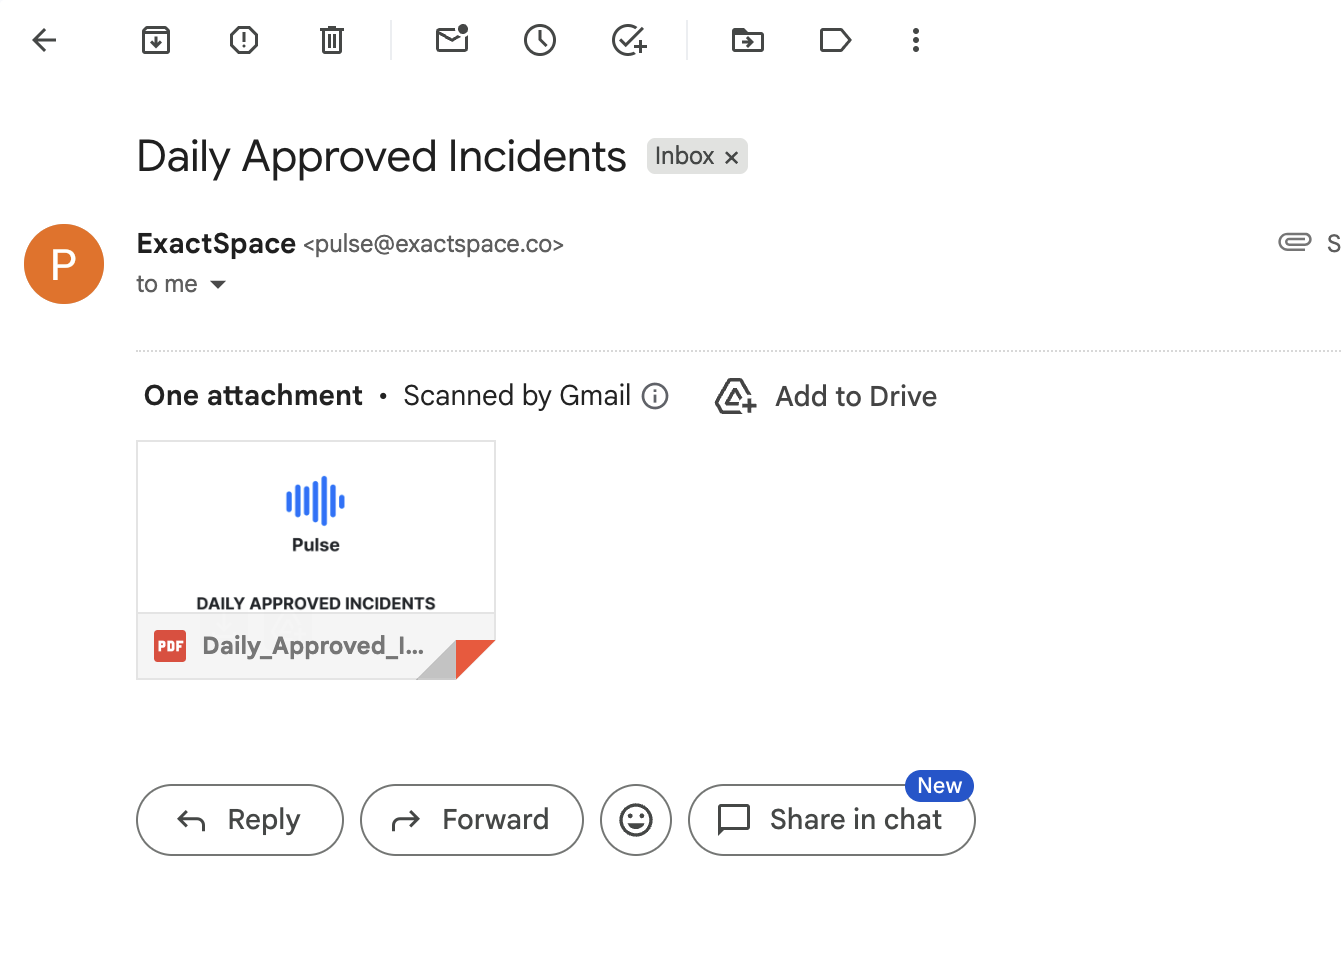
Figure 13. Email Notification Sent to Selected User
If multiple users are selected, all of them will receive the
notification. If multiple units are part of the scope, the
notification will be triggered separately for each matching unit.
Figure14. Select the source of channel- email or sms
This section ensures that once a condition is met, the right people
are informed via the channel selected without delay. The figure below
shows the Report sent through email notification to the selected user.
Figure 15. Example of email notification triggered

¶ Rule Preview and Validation
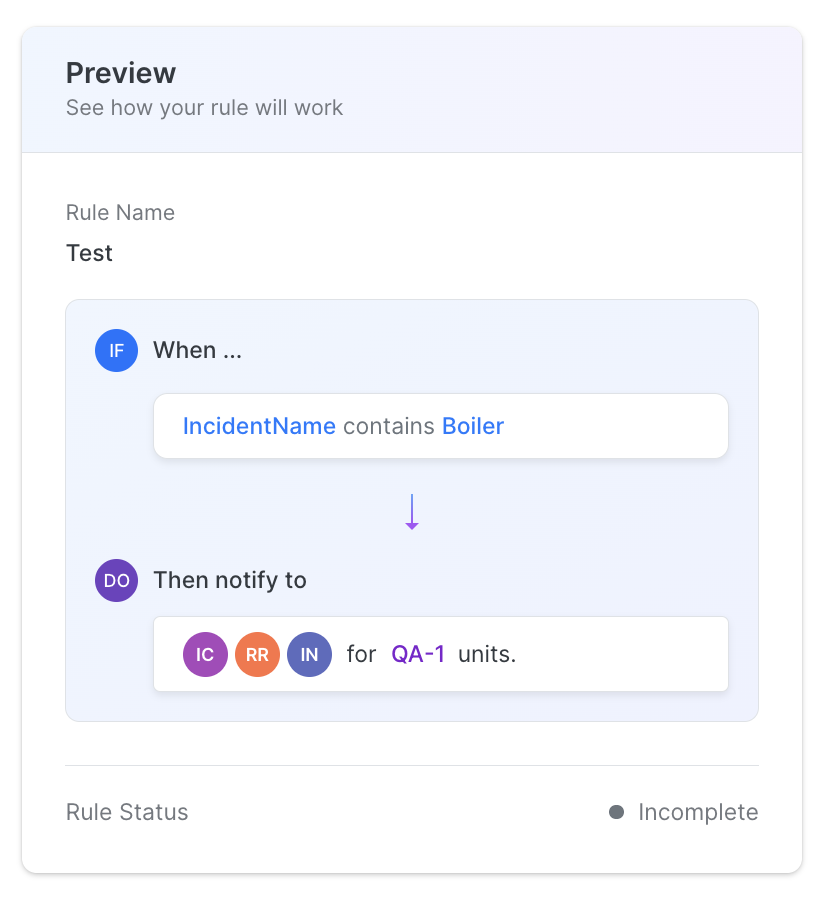
On the right-hand side of the screen, a preview panel is available. This
panel shows a summary of the rule that has been configured.
It presents the rule in a simple format, showing the conditions and the
corresponding actions. This helps the user quickly review the rule
before saving it.
Once the configuration is complete, the user can click on Save to
store the rule.
There is also an option to Test Rule, which allows the user to check
whether the rule is working as expected. If the test is successful, it
means the system is able to find matching data based on the defined
conditions. If the test fails, the user may need to review the
conditions or inputs.
Figure16. Rule Preview Panel Showing Condition and Notification Flow
¶ Rule Execution
After a rule is saved and enabled, it starts working automatically in
the background.
The system continuously monitors incoming data from the selected source.
Whenever a new event matches the defined conditions, the rule is
triggered, and the configured action is executed.
For example, if a new incident is created that matches the defined
conditions, the system will immediately send a notification to the
selected users or teams.
This process happens automatically and does not require any manual
intervention.
¶ Summary
The Rule Engine provides a structured way to monitor system data and
automate responses. By clearly defining where the rule applies, when it
should trigger, and what action should be taken, users can ensure that
important events are handled efficiently.
When used correctly, the Rule Engine helps improve visibility, reduce
manual effort, and ensure timely communication across teams.